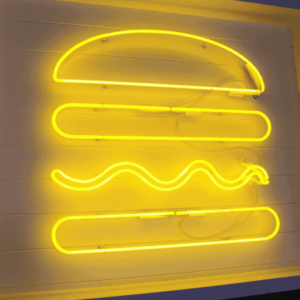
Step by Step Guide to Installing LED Neon Signs
You’ve just unboxed your custom LED neon sign. It looks amazing. But now you’re staring at your wall with a drill in one hand and the sign in the other, wondering if you’re about to mess this up.
Installing LED neon signs is easier than hanging a heavy mirror. Most LED neon signage runs on 12V power (safer than your phone charger). You need just 3-4 basic tools. You can mount it in under 20 minutes. The only real mistake is picking the wrong wall anchor and watching your $400 sign hit the floor.
I’m breaking down the real tool list you need, the simple math behind placement, and why the “use command strips” advice is a trap.
Table of Contents
ToggleDo You Need Special Tools?
No. You don’t.
Most people overthink this. Here’s what you actually need:
- Pencil (for marking)
- Measuring tape (your phone’s app works fine)
- Drill (or a hammer for light signs on drywall)
- Screws and wall anchors (match these to your wall type)
- Screwdriver (usually Phillips head)
- Level (optional but helpful)
That’s it. Under $30 if you’re buying everything new.
The confusion comes from commercial installations where electricians wire signs into main power. Your plug-in LED sign? Different story. You’re basically hanging a pretty light fixture.
Can I Install My LED Neon Sign Myself?
Yes. Most people can do this. However, it depends on three things:
- Your wall type: Drywall is easy. Brick needs a masonry drill bit. Glass or tile? Pick a different spot.
- Your sign size: Most custom LED neon signs weigh 0.5kg to 3kg. If yours is under 2kg and smaller than 80cm wide, you can do this yourself.
- Basic confidence: If you’ve ever hung a picture frame, you can handle this. The power adapter does all the electrical work. You’re not touching dangerous voltage.
I’ve seen people pay electricians $120/hour to screw in two anchors and plug in an adapter. That’s your choice, but it’s overkill.
How to Install Your LED Neon Sign: Real Steps
Installing LED signs is not a big deal if you know all the proper steps. Follow the given ones:
Step 1: Pick Your Location
This matters more than you think.
Placement Rules
- Hang it at 145-165cm from the floor (eye level for most people)
- Keep 15cm away from ceiling edges
- Avoid direct sunlight for more than 3 hours daily (UV damages the coating over time)
- For photos, position where window light hits it from the side, not head-on
Here’s something weird: Transformer placement affects sleep. That little black box makes a faint hum. Keep it 2m away from your pillow.
Step 2: Mark Your Drill Points
Your sign came with a paper template. Use it.
Tape the template to the wall. Use your level to make it straight. Mark through the holes with your pencil. Remove the template.
Real talk: Most templates assume you’re drilling into wall studs. But modern LED neon signs are so light that you don’t need studs. Good plasterboard anchors rated for 5kg will hold a 1.5kg sign forever.
Step 3: Drill Your Holes
This is where wall type matters.
For plasterboard (drywall)
- Use self-drilling anchors or toggle bolts
- Drill 6mm pilot holes
- Screw anchors in until they’re flush with the wall
- Put screws through the sign’s backing plate
- Tighten until snug (don’t overtighten or you’ll crack the backing)
For Brick
- Use a 6mm masonry drill bit
- Drill 40mm deep
- Tap in plastic wall plugs
- Screw in same as above
For Concrete
- Use masonry bit with hammer drill setting
- Use concrete anchors (not plastic plugs)
- Takes longer, as concrete is tough
Step 4: Hang the Sign and Hide Your Cables
This step separates good installs from messy ones.
Best Mounting Methods
- Clear clips (invisible from 2m away)
- Wall screws through backing plate (clean look)
- Hanging chains (good for industrial style, less secure)
- Command strips (don’t do this; I’ll explain why below)
Cable Management
Run your power cable along wall edges, not across open space. Use cable clips every 30cm. Hide the transformer behind furniture if you can.
Some custom LED neon signs from Melbourne shops include clear cable sleeves. Use them. They make your install look professional instead of rushed.
Step 5: Plug It In and Test
Plug it in. Does it light up? Good.
Flickering? Check the transformer connection. One section is dim? That’s a manufacturing fault (get a replacement). Buzzing sound? Move the transformer or get a new adapter.
Where Should I Put My Neon Sign?
Instagram says: above your bed, centred, perfect.
Reality: wherever it works without causing problems.
Best Spots By Room
- Bedroom: Above your headboard works. But side walls work better in small rooms (under 12 square metres). Keeps things balanced.
- Living room: Above console tables, besides your TV (not behind, as it creates glare), or on feature walls.
- Home office: Behind your desk for video calls. But angle it so it’s not directly in your webcam (causes bright spots).
- Outside: Only if your sign is IP65-rated or higher. Most custom signs are IP20 (indoor only). Check before you mount. I’ve seen people ruin signs on patios because moisture got inside.
Why Command Strips Are a Bad Idea
Everyone asks about command strips. Here’s why they fail:
Command strips need smooth surfaces and stable temperatures. Your textured wall that hits 32°C in summer? The adhesive fails. Not maybe; it will fail.
I’ve seen seven signs crash from command strip failures. Five were custom signs over 1m wide. The signs survived. The glass table under one of them didn’t.
Use proper anchors. It’s four extra minutes for years of security.
Safety Tips That Actually Matter
Electrical Basics
- Check your adapter has SAA approval (Australian safety marking)
- Plug into outlets with RCD protection (most homes have this)
- Don’t plug into power boards already running heaters or AC units
Physical Safety
- Keep signs 1m+ away from curtains (transformers get warm)
- Don’t mount above beds or desks where falling objects hurt people
The forgotten one: Hold your sign up before drilling. Does it tilt? Some designs are top-heavy. Add a third mounting point if needed.
What Does Professional Installation Cost in 2026?
If you want to hire someone, here’s current pricing:
- Basic install (drywall, under 1.5m): $100-180
- Brick install: $150-240
- Commercial LED signage: $350-900+
Melbourne prices run higher. You’re paying for expertise and insurance, not time. Most pros finish in 15-20 minutes.
DIY vs Professional: Quick Comparison
| Factor | DIY | Professional |
| Cost | $0-30 | $100-240+ |
| Time | 20-45 min | 15-20 min |
| Skill Needed | Basic | None |
| Risk | Minor wall damage | Almost zero |
| When to Use | Single signs, drywall | Commercial, outdoor |
Essential Takeaways
- You need basic tools like a drill, screws, anchors, and a measuring tape to handle most installs.
- Match anchors to your wall type. Use toggle bolts for plasterboard and masonry anchors for brick. Never use command strips for anything over 0.5kg.
- 12V systems are safe because you’re not doing electrical work. You’re just plugging in an adapter.
- Cable management matters. Spend five minutes hiding cables properly for a clean result.
Common Questions Answered
1. Can LED neon signs stay on 24/7?
Yes, quality signs last 50,000+ hours (5-6 years continuously), but running them 12-14 hours daily extends life and saves power.
2. Do they use much electricity?
No, most use 5-20 watts, costing about $8-15 yearly if run 8 hours daily in Melbourne.
3. How do I clean my sign?
Turn it off, wait 10 minutes, and wipe with a dry microfibre cloth. Make sure to not use water or chemicals.
4. What’s different from glass neon?
LED neon uses flexible silicone with LEDs (safer, lighter, and cheaper); glass neon uses electrified gas tubes (fragile, hot, and needs licensed electricians).
5. Can I cut the power cable?
No, this voids warranties and needs re-soldering; just hide excess cable with clips instead.
Final Words
Stop planning. Start measuring.
Grab your phone. Use the measure app or a real tape measure. Mark where you want your sign’s centre. Take a photo. Show someone you trust. Get feedback before you drill.
The biggest mistake isn’t the wrong anchor or missing tools. It’s mounting in a spot you’ll hate in three weeks.
Measure. Visualise. Then drill.
You’ve got this.